In today’s digital age, file compression has become an indispensable tool for managing and transferring data efficiently. Among the myriad of compression formats, ZIP remains one of the most popular due to its widespread support and ease of use. If you’re new to the world of file compression, learning how to extract ZIP files is a fundamental skill that can save you time and hassle. In this beginner’s guide, we’ll walk you through the simple steps of extracting ZIP files like a pro.
Understanding ZIP Files
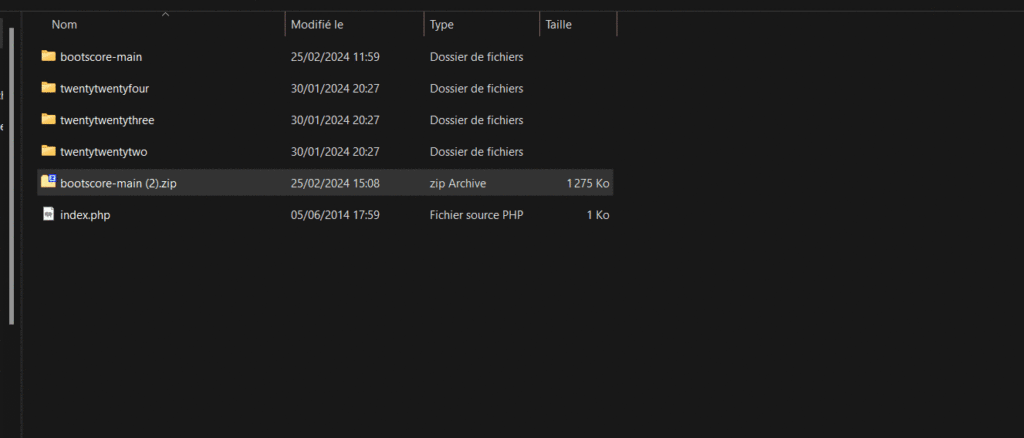
ZIP files, denoted by the “.zip” extension, are archives that contain one or more compressed files or folders. They are widely used for bundling and compressing files and folders to reduce their size for storage or transmission. Whether you’re downloading software from the internet or receiving multiple files via email, chances are you’ll encounter ZIP files.
When dealing with ZIP files, it’s important to exercise caution, especially when extracting files from unfamiliar or untrusted sources. Malicious actors may exploit ZIP files to conceal malware or other harmful content, posing a significant security risk. To mitigate this threat, consider using reputable antivirus software to scan ZIP files before extraction. Additionally, exercise discretion when downloading files from the internet or opening attachments in emails, as they may contain ZIP archives with malicious intent. By remaining vigilant and prioritizing security measures, you can minimize the risk of falling victim to malicious ZIP files and safeguard your digital environment.
Extracting ZIP Files on Windows
Method 1: Using File Explorer
- Locate the ZIP file: Navigate to the location where the ZIP file is saved.
- Right-click the ZIP file: Right-click on the ZIP file icon.
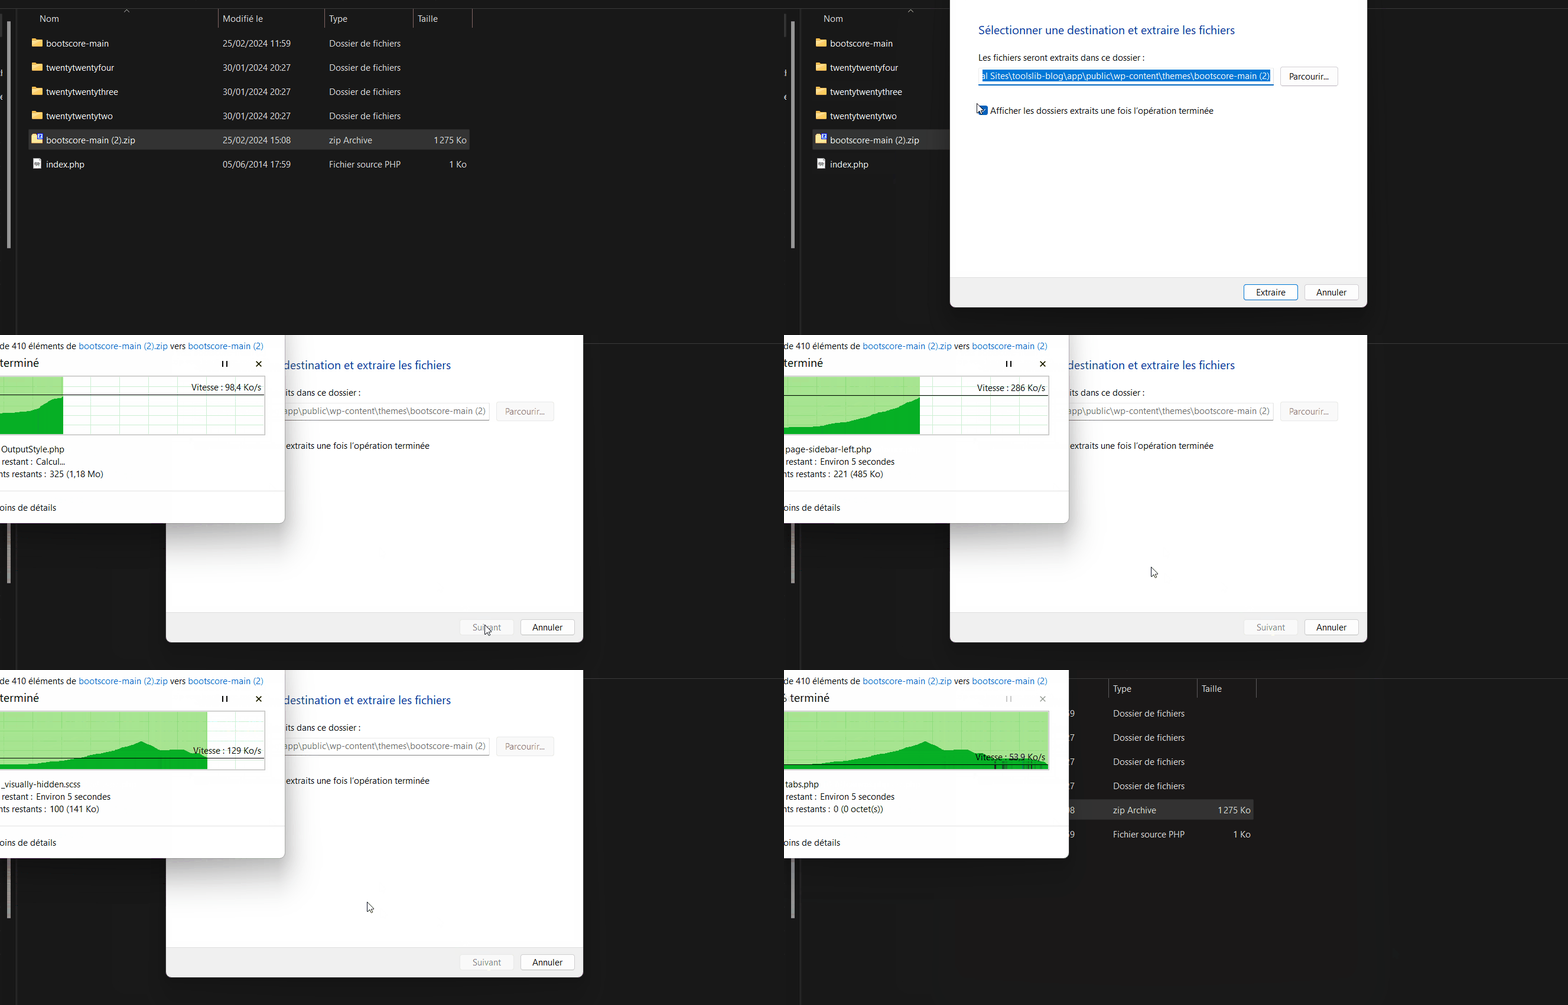
- Select “Extract All”: From the context menu, choose “Extract All.”
- Choose extraction location: Choose the destination where you want to extract the files.
- Click “Extract”: Click the “Extract” button to start the extraction process.
- Access your files: Once extraction is complete, you can access the extracted files in the specified destination folder.

Method 2: Using Built-in Zip Tool
- Locate the ZIP file: Find the ZIP file in File Explorer.
- Double-click the ZIP file: Double-click on the ZIP file icon to open it.
- Drag and drop: Select the files or folders you want to extract, then drag them to the desired location in File Explorer.
Extracting ZIP Files on macOS
Method 1: Using Finder
- Locate the ZIP file: Navigate to the location of the ZIP file in Finder.
- Double-click the ZIP file: Double-click on the ZIP file to unzip it.
- Access your files: Once the extraction is complete, you can find the extracted files in the same location as the ZIP file or in a new folder.
Method 2: Using Archive Utility
- Locate the ZIP file: Find the ZIP file in Finder.
- Double-click the ZIP file: Double-click on the ZIP file icon to unzip it.
- Access your files: Once extraction is complete, you can access the extracted files in the same location as the ZIP file or in a new folder.
Conclusion
Mastering the art of extracting ZIP files is a fundamental skill that can streamline your workflow and help you manage your digital assets more effectively. Whether you’re a Windows aficionado or a macOS devotee, the process is simple and intuitive. By following the steps outlined in this guide, you’ll be well-equipped to handle ZIP files with ease and confidence. So, the next time you encounter a ZIP file, fear not—unzipping it will be a breeze!

Founder of ToolsLib, Designer, Web and Cybersecurity Expert.
Passionate about software development and crafting elegant, user-friendly designs.
Stay Updated with ToolsLib! 🚀
Join our community to receive the latest cybersecurity tips, software updates, and exclusive insights straight to your inbox!

